|
1. On your computer keyboard, press the Windows key and R at the same time to open the Run dialog box.
|

|
|
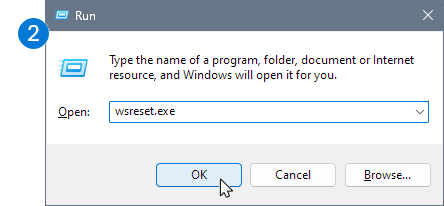
2. Copy or type wsreset.exe into the box then select OK.
Note: A blank Command Prompt window will open and close briefly, then the Microsoft Store app will open. You can ignore these and close any unwanted windows.
|
|
|
If OneDrive is still not syncing, let's continue with resetting the OneDrive sync app.
|
|
3. Press the Windows key and R again.
|

|
|
4. This time copy the text below and paste it into the dialog window, then press OK.
%localappdata%\Microsoft\OneDrive\onedrive.exe /reset
|

|
|
5. If you see a "Windows cannot find..." message, copy and paste the text below instead, then press OK.
C:\Program Files\Microsoft OneDrive\onedrive.exe /reset
|

|
|
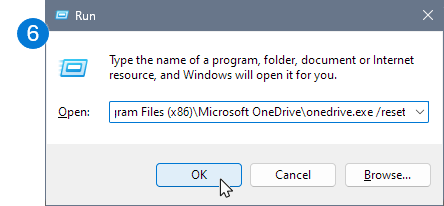
6. If you still see a "Windows cannot find..." message, copy and paste the text below instead, then press OK.
C:\Program Files (x86)\Microsoft OneDrive\onedrive.exe /reset
Note: If none of these steps work, you do not have the OneDrive sync app installed. Learn more.
|
|
|
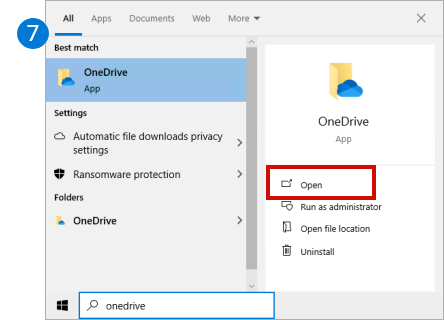
7. Manually restart OneDrive by going to Start , type OneDrive in the search box, and then click on the OneDrive desktop app.
|
|